So maybe fairy cakes aren’t a student essential, but it’s nice to do something a bit fun and different once in a while. They can also make a lovely – and cheap – birthday present if you pop them in a little box. Trust me when I say that baked goods go down very well with other students 🙂 I’ve also more or less mastered the art of two-tone icing and I think it really transforms fairy cakes into mini masterpieces that are almost too pretty to eat! (Although I can normally be persuaded…) Read on to beat away those January blues with these bright beauties.
Ingredients to make 14-18 fairy cakes:
This is the classic 6-6-6 ounces Victoria sponge recipe that can be easily scaled up or down as you fancy according to these ratios. As well as fairy cakes it can be used to make a two-tiered sponge.
- plain flour (£0.40, Tesco)
- caster sugar (£0.99, Tesco)
- butter (£0.85, Tesco)
- eggs (£0.89, Tesco)
- baking powder (£1.29)
- vanilla extract (£1.09)
- This recipe couldn’t be simpler! Start by preheating the oven to gas mark 5. Then tip 6 ounces (or 170g) of plain flour, caster sugar and room temperature butter into a large mixing bowl along with 3 eggs, 1.5 teaspoons of baking powder and 1 teaspoon of vanilla extract. Using a hand-mixer or a wooden spoon beat until smooth.
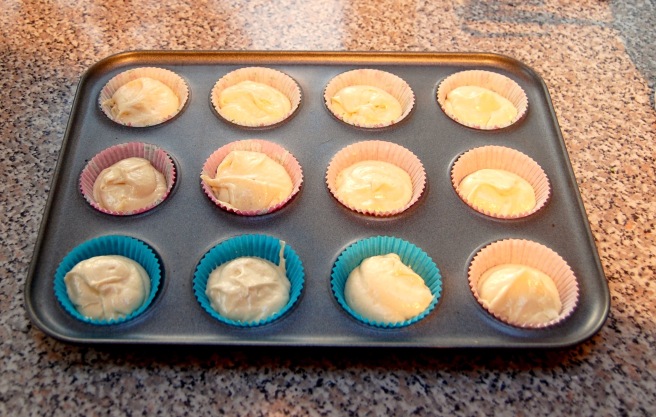
2. Spread evenly among fairy cake cases then bake in the oven for 10-15 minutes on the top shelf until they are golden brown on top.
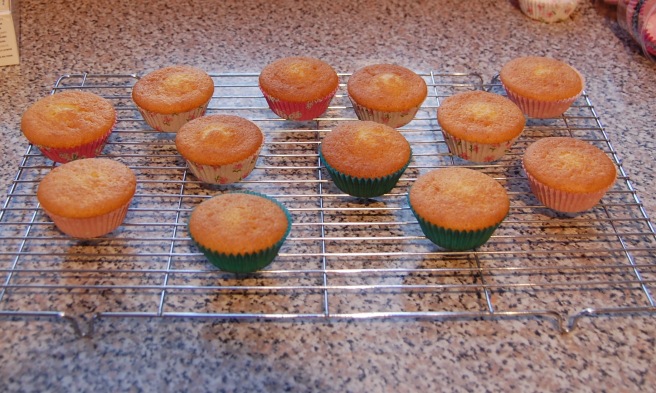
3. Allow to cool fully before making the icing.
Ingredients for the icing:
- icing sugar (£0.78, Tesco)
- sunflower spread (£0.89, Tesco)
- vanilla extract (£1.09, Tesco)
- food colouring of your choice – I got these special gel colours for Christmas as I love baking but they’re a little on the pricey side and any supermarket will have their own brand version
You’ll also need a piping bag – I got mine from Wilko for £1 and it worked perfectly fine.
- When it comes to making icing I don’t really weigh anything as it’s easy to see if it looks more or less right. Bear in mind that if you use a piping bag like me you’ll need more icing than you think – I used up nearly the entire 500g bag of icing sugar to ice all of these fairy cakes.
- Carefully mix together icing sugar with at least two large spoonfuls of sunflower spread and a few drops of vanilla extract. Make sure you make plenty of icing as you don’t want to run out halfway through and have to try and mix the exact same colours again! Another tip is to make sure that the icing is really thick, almost so much so that you cannot stir it anymore, because then it will hold its shape when it is piped. When you have enough, separate it into two bowls and mix your colours as you wish.
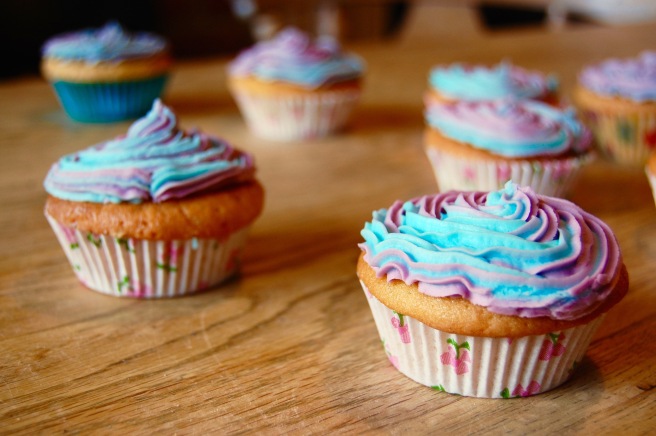
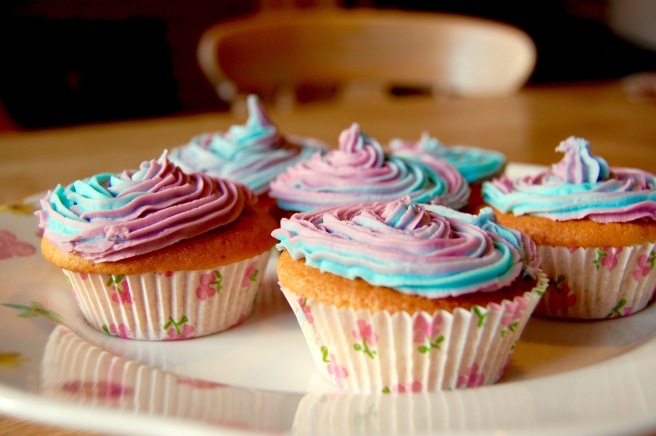
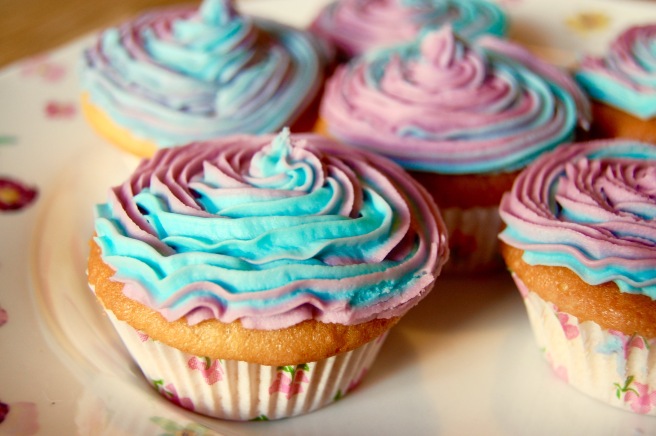
- Now comes the fiddly bit! It may help to look up a few Youtube tutorials to help you get the idea for this. What you essentially want to do is put one colour down one side of the bag, and the other down the opposite side, without them mixing too much. What I normally do is lie the piping bag down on its side, get a good dollop of icing on a wooden spoon and basically wipe along the inside of one of the sides of the bag. Then place the bag upright in a tall glass, and gravity will help ease it down. Flip the bag over and repeat. This does get rather messy and I have never got it perfect, however it still turns out pretty nice even if the colours do mix! When you’re ready to pipe, twist the top of the bag and away you go! It’s worth doing the first squeeze onto a plate, just to check that you’re getting both colours coming through.
And here is my finished product! I got a bit snap-happy with my camera as these cakes were just so photogenic, so I hope you like the extra photos on this post. I love how the colours blend into each other and no two cakes look the same.
I was so enthralled by my pastel cakes that I decided to put a semi-permanent pastel lilac dye on my hair! If you’re interested, I used Directions dye from Amazon and mixed it with white conditioner and left it on my hair for about an hour as it doesn’t have any damaging ingredients. It’s subtle, but I think it turned out quite nice.

Wishing you all a very colourful, and happy new year!

Fairy cakes are the best! So versatile and tasty 🙂
LikeLiked by 1 person
Yes exactly! 🙂
LikeLiked by 1 person
Love the two tone icing by the way. Very clever!
LikeLike
Thank you! 🙂 It looks fancier than it really is – once you get the hang of it it’s quite easy 🙂
LikeLiked by 1 person
Your fairy cakes are so pretty! I love the two-tone icing but would probably make a real mess out of it if I tried. I really like how the lilac came out in your hair too! 🙂
LikeLiked by 1 person
Thank you so much! :)) To be honest I was quite surprised myself because the icing looked like a bit of a mess when I got it in the piping bag, but somehow it turned out alright. So it is worth a try if you fancy it! 🙂
LikeLike
They look so yummy!!
LikeLiked by 1 person
Thanks so much Alicia! 🙂
LikeLike
I really like that blazing sky-blue. It is my favourite color, and with that the cakes look awesome. Wish I had an oven in my home.
LikeLiked by 1 person
Thank you, blue is my favourite colour too! You could always try making the icing and buying some cakes? (I know shop-bought things are never the same though!)
LikeLike
cake = always essential! Great post, will get brushing up on my baking.
lilyrachel.wordpress.com
LikeLiked by 1 person
Agreed! Thank you 🙂
LikeLike
These look so pretty! Love the hair inspiration too.
LikeLiked by 1 person
Thanks Sophie! 🙂
LikeLike